Hey y’all! It’s been a little while, but I had to take a little hiatus for the birth of my very 1st granddaughter! I tell you, there is no greater gift, other than the birth of your own children, than the gift of becoming a Nana… I just want to look at her face all day every day 🙂 And smooch her, and nibble her little cheeks off…. but my son-in-law seems to think that might make me a cannibal, LOL… Anyway, my new granddaughter Hanna inspired today’s blog post.
Before she was born, I had the idea to make her a flannel rag quilt, but had no idea how to do it. So after the obligatory Google and Pinterest searches, blog reads, and shopping trip to the fabric store, I set out on my raggy journey. And what I found out is, it is extremely easy to do! You simply cut the flannel squares, double layer the squares and baste a big X in the middle for security, sew them together in the desired configuration with the seams on the top side (which admittedly seems counterintuitive, LOL), and then snip all the seams. The last step is to toss it in the washer & dryer, and the normally quite annoying property of flannel to fray on the edges when washed actually becomes the most beneficial finishing step of the process!
Here is her quilt, with 6 inch squares in a 6×6 configuration, done with 3 layers of flannel:

I even monogrammed the lower right corner with my handy dandy embroidery machine, and I am just soooo tickled with how it turned out!

It turned out so well, that I had to make more! Especially since Joann’s had a sale on flannel, and they had some really cute boy themes! Which was perfect, since my good friend is having a boy, and I promised the hubs that I’d try to only buy fabric I had a plan for due to space restrictions. (little does he know my fingers were crossed when I promised – muahahahahahaha!)
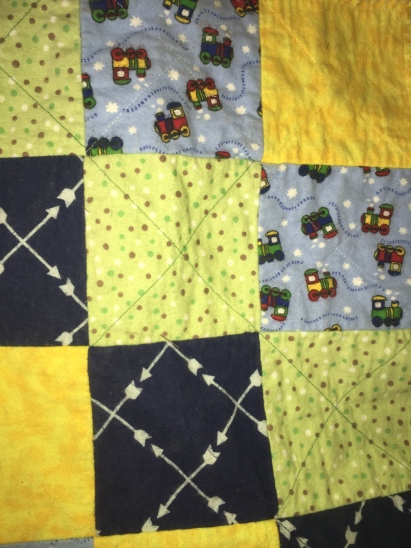
I decided to switch it up a bit on the second one though. My friend lives in a warmer climate, so I cut it down to 2 layers of flannel instead of 3. My daughter suggested a rectangular shape would be more crib/bed friendly, so I arranged the squares in a 5×7 configuration. Here’s the end result:

You might notice that the monogram is also oriented diagonally instead of straight – also a suggestion from my daughter. She doesn’t think she’s very creative on her own, but she really does a great job helping me edit and fine tune things, doesn’t she?? If you look up close, you can see the monogram has a mix of fonts and colors to add even more personalization to the little dude’s new blankie.

The back side matches the front exactly minus the seams, although you could totally take advantage of the opportunity for added creativity if you wanted!

I’m telling you – I am TOTALLY addicted to making these! I’m working on a tutorial for these, so if you’re interested, keep your eyes peeled in the near future!
In the meantime, if you’re interested in ordering one, leave me a comment below, or visit my Facebook page and send me a message!
One thought on “Gettin’ Raggy With It!”