Before I get into the low down of dyeing this type of fiber, I should really give you the back story on why I had to do it in the first place…
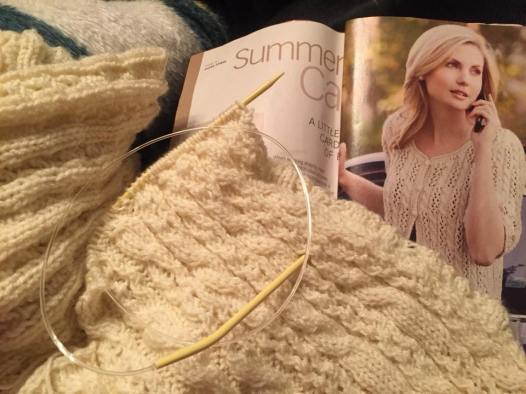
Picture it, Sicily 1927, a little town north of Chattanooga TN in the summer of 2009… I was in Hobby Lobby, on the hunt for a new knitting project. I bought a magazine, some skeins of acrylic yarn, and some appropriately sized circular needles. It’s probably fitting to also admit that it was to be my first knitted garment, not counting the crudely crafted “halter top” I designed when I was 13. (trust me, that halter top is yet another example of why I am glad the internet was not around when I was a kid, LOL!)
I had originally bought enough yarn per the pattern instructions, but over the years, the project was shoved in a plastic bag, unfinished, and left to gather dust. And during that time, I robbed a skein or 2 for other projects, never imagining I would actually go back and finish the sweater. Fast Forward to November 2017… Christmas is on the horizon, money is extremely tight, and I am going through my large mound of WIPs (works in progress) to select projects to finish and give as gifts. In the back of the closet was this plastic bag containing a nearly finished sweater on old plastic circular needles, 1 skein of yarn, and a magazine that is so old it’s starting to yellow. My sister-in-law immediately came to mind, and I knew this sweater would make the perfect gift for her!
After spending a little time reviewing the pattern and counting stitches and rows, I figured out where I had left off, and the knit & purl & cable tango began. So far so good, right? I mean, that’s a major accomplishment since this baby had been in the bag for years! Finish the front shoulder that was missing – CHECK!! Bind all that off – CHECK!! Knit the 1st sleeve – CHECK! Knit the second slee— OH CRIPES!!! I ran out of yarn 😦 Remember when I said I robbed skeins? Well, it came back to bite me… and HARD! Luckily, though, the brand and color are still available, so I sent the hubs back to Hobby Lobby to bail me out.
When he got home, I cast on the remaining sleeve, and, when it was all sewn together, it was VERY evident that the dye lots were wayyyyyy off. Even in the poorly lit living room in the evening, I could tell. Heck, Stevie Wonder could tell it didn’t match! I guess color matching after 8 years between dye lots was too much to ask, LOL…

Of course the obvious solution would have been to frog back to a point where I could have added the change in yarn as a design element, but there was NO WAY IN H-E-DOUBLE-HOCKEY-STICKS that I was going to frog one single stitch… UH-UH, NO WAY, NO HOW! Every single stitch in this 8 Year Sweater was precious to me!
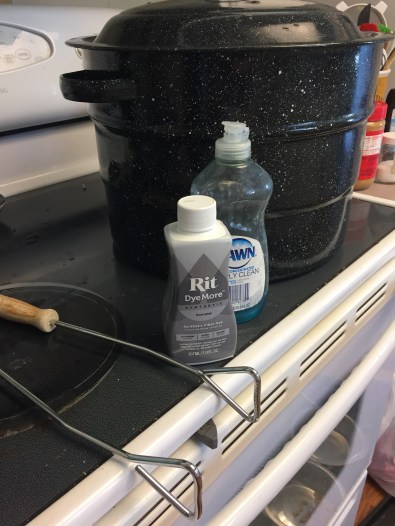
You all have seen that I dye wool blends, but I had never tried to dye acrylic. I thought “meh – how hard could it be?” Welllllllllllllll…. Apparently acrylic and other synthetic fibers are not dyeable in the traditional sense. Every bit of information I found said the only way to change the color would be to “paint” the yarn with acrylic paint. And after reviewing the process, it didn’t sound like it would make me happy. A friend happened to recommend that Rit had a new dye for synthetic fibers called Rit DyeMore. Skeptical but desperate, I sent a silent prayer up to the Lord, and submitted my order on Amazon. In just a couple of days, I was ready to go!
I gathered my giant pot, the Rit dye, and the dish soap, and again said another prayer.
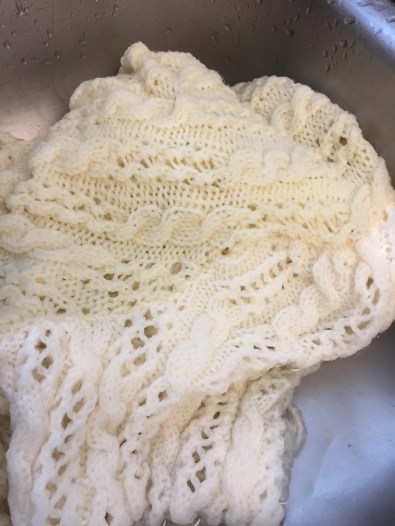
First, I had to bring some water to boil, and while I was waiting for that, wash the sweater in the sink to get all residue off.
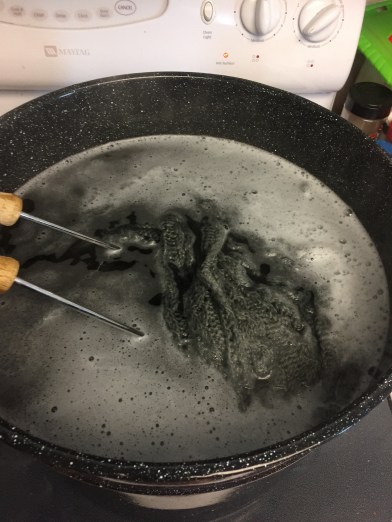
When the water reached 180 degrees, I added one bottle of dye and the dish soap. I ordered 2 – thank the Lord, and you’ll see why in a minute. But to start, I just used 1. Submerge the sweater and then continuously stir, scoop with tongs, dunk, swish, swirl for 30 minutes… that’s what the bottle said, and I thought “meh – easy enough”. Well, it only took about 5 minutes for my arms to feel like they were about to fall off! I held out for as long as I could, but after 20 minutes I couldn’t take it anymore and called it done.
Time to hand wash and rinse in the sink to get all the dye out. And much to my dismay… ALOT of the dye went right down the drain instead of into the fiber. Some of it did stick, but it was pretty splotchy and inconsistent. And the worst of it was I could still tell the sleeve was a different color. But, just like your hair looks different when it’s totally dry, I was hopeful that once the sweater was dry, the colors would appear to have blended better. So I laid it out on the towel and let it dry.
Later in the day, it became abundantly clear that nothing changed – it was still splotchy. My only hope was the 2nd bottle. What did I have to lose? If it didn’t work, the sweater was headed for the dumpster because I was getting FED. UP. Did I mention how much of a pain in the RUMP all that dunking and stirring is? groan!
The second time around, I made SURE that the water stayed at 180 degrees. I watched the time and diligently stirred for the entire 30 minutes, which incidentally resulted in a really bad sprain and a visit to the orthopedic surgeon. I’ll be going for nerve conduction studies too to determine if I have to have carpal tunnel surgery, but hey – I digress! Suffice it to say I really have a lot invested in this sweater, LOL!
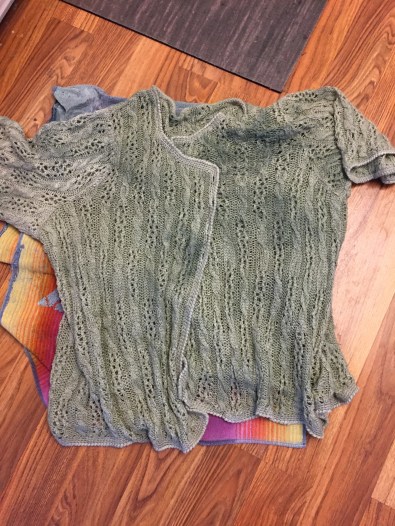
After the 2nd round of cooking, the color change looked significantly better! There are still spots that look a bit “marbled”, but at least the sleeve and border did not look like a completely different color. Once again, I laid the sweater out on the towel and left it overnight to dry.
The next day, having decided to be ok with the color, I held the sweater up and quickly realized I was a little over zealous when blocking the sweater. It grew from a size L to a size 3-4X… ENTIRELY too big for my sister-in-law. I said a lot of swear words, and put the sweater in time out. And my husband picked up the slack and went to buy her a gift.
Last night, I thought I would try one final life-saving intervention to see if the sweater could be salvaged. I through it in a net bag and ran it through the machine was and dryer. Remember – it’s acrylic so it’s machine washable 🙂 I didn’t expect it to shrink, but my hope was that at least the fibers would redistribute a little more evenly. I am SO GLAD I was patient and held out, because, even though the sweater is still a bit big, even on me and has some marbled spots, it is finally wearable! Yay!!!! I need to adjust the buttons a bit to compensate for the variance in the side lengths (I told you I was over zealous, lol), but over all, I will have a “new” sweater for Spring time!


The moral of this story is this…. buy enough yarn for the entire project. And then LEAVE IT ALONE! If you do decide to rob from the yarn supply, scrap the project or plan how to incorporate a new dye lot IN ADVANCE. Trust me… You’ll thank me later, LOL! All in all, I would say the Rit DyeMore was a success, but not worth the effort unless it’s a dire emergency 🙂


Wow. That was an adventure!
LikeLike